How to Prepare Your Home Before Rendering Begins
Rendering can completely change your home’s appearance, giving it a fresh, modern look that stands out in your neighbourhood. But here’s what many Newcastle homeowners don’t realise: the success of your rendering project depends just as much on proper preparation as it does on the quality of the render itself.
If you’re planning to render your home, taking the time to prepare properly can save you money, prevent delays, and ensure your new finish lasts for years to come.
With years of hands-on experience in exterior surface preparation and rendering, our team at Origen Projects ensures your home is properly protected and ready for a smooth, long-lasting finish. Let’s walk through exactly what you need to do before the rendering team arrives at your property.
Why Proper Preparation Matters
Think of rendering like painting a canvas. You wouldn’t apply paint to a dirty, damaged surface and expect brilliant results. The same principle applies to render.
When preparation is overlooked or rushed, you might encounter:
✓ Cracks appearing within months of completion
✓ Render pulling away from the wall
✓ Uneven finishes or discolouration
✓ Moisture problems that damage the new surface
✓ Shortened lifespan of your investment
In Newcastle’s coastal climate, where humidity, salt air, and temperature fluctuations are common, thorough preparation becomes even more necessary.
Step 1: Clear the Area Around Your Home
Before any rendering work begins, you’ll need to make the worksite accessible and safe.
Remove or relocate
✓ Outdoor furniture and decor
✓ Potted plants and garden features
✓ BBQs, bikes, and stored items
✓ Vehicles parked close to walls
✓ Washing lines and outdoor equipment
Protect what stays
✓ Cover garden beds with drop sheets
✓ Protect paving and decking areas
✓ Shield external lights and fixtures
✓ Secure pets in a safe area away from the work zone
Creating clear access not only speeds up the job but also prevents accidental damage to your belongings. Most professional renderers need at least one metre of clearance around the entire perimeter of your home.
")
Step 2: Inspect Your Walls
Before rendering begins, walk around your home to identify any potential issues.
Look for
✓ Cracks in existing walls or render
✓Loose or hollow-sounding areas (tap gently with your knuckles)
✓ Signs of moisture or damp patches
✓ Peeling or flaking paint
✓ Damaged brickwork or mortar joints
✓ Salt deposits (efflorescence)
While your rendering team will conduct their own inspection, spotting these issues early means you can discuss solutions upfront rather than discovering problems mid-project.
Step 3: Address Moisture Issues
Moisture is one of rendering’s biggest enemies. Applying render over damp walls can lead to bubbling, cracking, and premature failure.
Check for
✓ Dark patches that remain after dry weather
✓ Green algae or mould growth
✓ Water stains around windows or downpipes
✓ Blocked weep holes
✓ Soil or garden beds built up against walls
If you notice any moisture problems, address them before rendering starts. This might involve fixing leaking gutters, improving drainage, or lowering garden bed levels. Your renderer can advise on specific issues they identify during their site inspection.
Step 4: Consider Existing Paint and Coatings
Many Newcastle homes have painted brick or previous render coatings. Whether these need removal depends on their condition.
Our rendering professionals assess
✓ How firmly existing paint adheres to the surface
✓ Whether previous render is stable or failing
✓ If the surface requires cleaning, sealing, or complete removal
Generally, loose or flaking paint must be removed to ensure proper adhesion. Some surfaces may need specialised primers or bonding agents, particularly if you’re rendering over painted surfaces or non-standard materials.
Step 5: Plan for Weather Conditions
Newcastle’s weather can be unpredictable, and timing matters when it comes to rendering.
Ideal conditions for rendering
✓ Mild, overcast days with moderate temperatures
✓ Low humidity levels
✓ No rain forecast for at least 24 to 48 hours after application
✓ Temperatures between 10-30°C
Avoid rendering when
✓ Heavy rain is predicted
✓ Extreme heat is expected
✓ Strong winds are forecast
✓ Walls are still wet from recent rain
Your professional rendering team will monitor weather forecasts closely and may reschedule if conditions aren’t suitable. This isn’t a delay but a quality control measure that protects your investment.
Step 6: Communicate with Your Neighbours
Rendering can be a messy process, and it’s courteous to let your neighbours know what’s happening.
Give them a heads up about
✓ The project timeline
✓ Potential noise from equipment
✓ Vehicles and parking needs
✓ Any shared access requirements
Most rendering projects for standard homes take 3 to 7 days, depending on the size and complexity. Clear communication helps maintain good relationships and prevents misunderstandings.
Step 7: Make Interior Preparations
While rendering is primarily an exterior job, some preparation inside your home can prevent disruptions.
Consider
✓ Closing windows on the side being rendered
✓ Moving furniture away from exterior walls if needed
✓ Informing household members about the work schedule
✓ Arranging alternative access if front or back doors are blocked
✓ Planning for pets and young children during noisy work periods
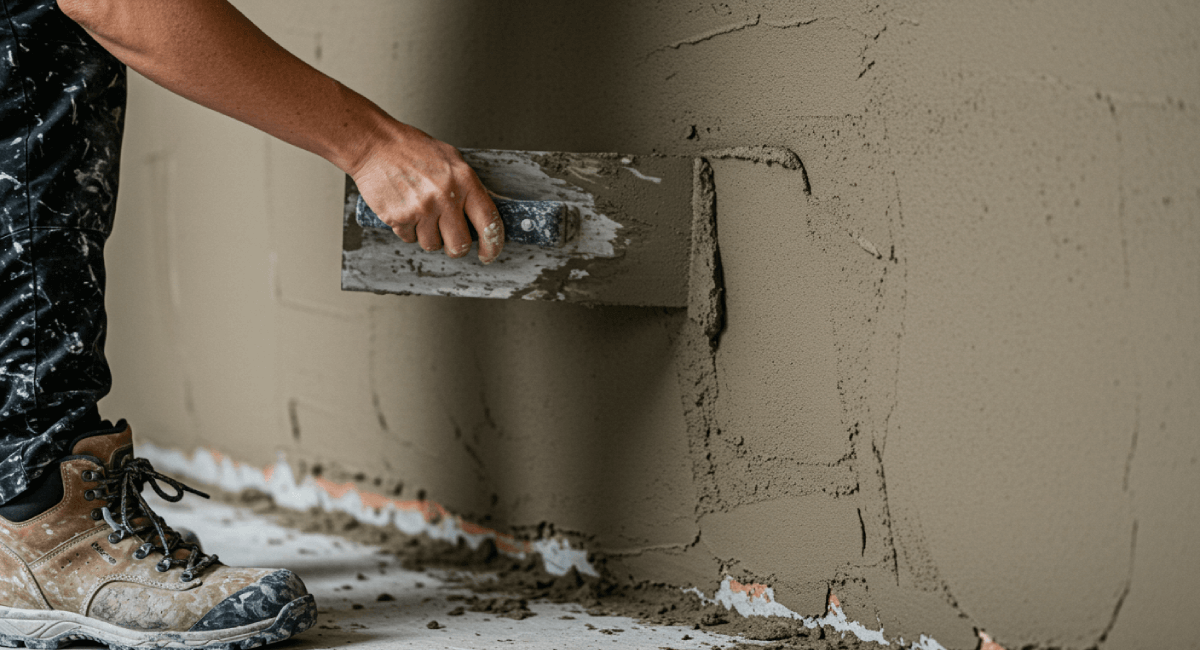
Step 8: Understand What Your Renderer Will Do
Professional rendering teams handle most technical preparation themselves, but it helps to know what’s involved.
Your renderer will typically
✓ Clean all surfaces thoroughly
✓ Repair minor cracks and damage
✓ Apply appropriate primers or bonding agents
✓ Protect windows, doors, and fixtures
✓ Mix render to the correct specifications
✓ Apply render in proper layers with adequate drying time between coats
At Origen Projects, we always conduct a detailed site inspection before starting work. This allows us to identify any specific preparation requirements for your property and explain the process clearly.
Common Preparation Mistakes to Avoid
Even with the best intentions, some homeowners make mistakes that complicate their rendering projects.
Don’t:
✓ Pressure wash walls the day before rendering starts (walls need time to dry)
✓ Assume render will hide all existing problems
✓ Schedule rendering during the wettest months without flexibility
✓ Skip repairs to underlying structural issues
✓ Rush the preparation phase to meet an arbitrary deadline

What About Special Surfaces?
If your home has unique features or materials, mention these to your renderer during the quote stage.
Special considerations include
✓ Polystyrene cladding
✓ Fibre cement sheeting
✓ Previously rendered surfaces
✓ Timber-framed homes
✓ Heritage or older properties
Different substrates may require specific primers, bonding agents, or render systems. Being upfront about your home’s construction helps your renderer recommend the right solution.
Your Preparation Checklist
To recap, here’s a simple checklist you can follow before rendering begins:
Two weeks before
✓ Book your rendering team
✓ Inspect walls for damage or moisture
✓ Address any drainage or damp issues
✓ Notify neighbours
One week before
✓ Confirm the start date
✓ Clear the work area
✓ Arrange alternative parking if needed
✓ Plan for pets and children
Day before
✓ Move remaining outdoor items
✓ Protect garden beds and paving
✓ Confirm weather forecast is suitable
✓ Ensure clear access to all walls
Trust the Professionals
While homeowner preparation is helpful, remember that professional renderers bring expertise and experience that makes all the difference. At Origen Projects, we’ve worked on hundreds of Newcastle homes since 2016, and we know exactly what preparation is needed for lasting results.
From traditional cement-based render to modern acrylic finishes, we handle every aspect of surface preparation as part of our service. Our team assesses each property individually, addresses underlying issues properly, and applies render using proven techniques that stand up to Newcastle’s coastal climate.
Ready to Refresh Your Home?
Proper preparation sets the foundation for stunning, long-lasting rendering results. By knowing what’s involved and working with experienced professionals, you can ensure your home’s transformation goes smoothly from start to finish.
Whether you’re updating a weathered exterior, modernising an older home, or adding the finishing touch to a new build, quality rendering delivers style and protection that lasts.

Get your free quote today and see how Origen Projects can restore your Newcastle home with expert rendering services. Our team is ready to discuss your project, answer your questions, and give honest advice on the best approach for your property.
Origen Projects
📞 0485 991 466
🌐 origenprojects.com.au
📍 Serving Newcastle and surrounding areas
FAQs
How long does it take to prepare a home before rendering starts?
Preparation time depends on the size and condition of the property, but most homes require 1 to 3 days for cleaning, repairs, masking, and surface priming before rendering can begin.
Do I need to move furniture or outdoor items before rendering work starts?
Yes, it’s best to clear patios, outdoor furniture, vehicles, and wall hangings near work areas. This ensures easy access for tradespeople and protects your belongings from dust or splatter.
Will cracks and damaged walls be fixed during the preparation stage?
Absolutely. Surface repairs such as filling cracks, patching holes, and stabilising loose areas are essential steps to ensure the render adheres properly and delivers a smooth, durable finish.